2023 R1: What’s New in EMA3D® Cable (now Ansys EMC Plus)
EMA3D® Cable (now Ansys EMC Plus) 2023 R1 new capabilities and features are ready for use and enables full-device and full-vehicle simulation.
EMA3D® Cable is a platform-level electromagnetic compatibility (EMC) modeling software used for simulating electromagnetic interference (EMI) and EMC effects to provide design and certification support.
Featured updates include:
- New Automated Workflows
- New Application Program Interface (API)
- New Tools to Easily Work with Multiple Cable Harnesses
A key contribution to EMA3D® Cable’s already proven success is tight integration within the Ansys environment. EMA3D®’s graphical user interface (GUI) and geometry workflow is built on Ansys Discovery, creating a familiar user experience and easy import of complex geometry. EMA3D® already accepts data generated from Ansys SIwave and Ansys HFSS simulations, and in the latest update will also integrate the use of Ansys Granta, Ansys optiSLang, and Ansys ModelCenter.
A number of new features in 2023 R1 helped to make full-device radiated emissions simulation possible. In 2020, EMA teamed up with Ansys and Intel to simulate the radiated emissions of an entire computer server. Using EMA3D®, HFSS, and SIwave, engineers were able to model the printed circuit boards (PCB), internal electronic devices, enclosures, and the cables inside of the server to find the total radiated emissions. You can read more about the study by clicking here.
“All the complexity of that real computer server was captured in that simulation,” EMA President Tim McDonald said. “It turned something that was impossible into something that was practical and doable.”
Featured Update 1: New EMA3D® Automated Workflows
Featured update number one is new automated workflows, allowing users to open the geometry in EMA3D® Cable and with just one click start the simulation process.
Shielding Effectiveness
The first automatic workflow is to find shielding effectiveness, which is essential for product designers. In EMA3D® Cable, it now takes one-click with the help of Ansys Granta, a product materials intelligence tool. The process has been built for both new and previous users.
“You may not be an electromagnetic engineer and you might still have to model shielding effectiveness, so we needed to make a workflow that was maybe for someone who’s new to using simulation or a non-EM (electromagnetic) expert,” McDonald said.
To start, EMA3D® captures the material properties. If the user has access to Granta, EMA3D® automatically assigns the material properties based on the assignments and computer-aided design (CAD), a closer at how it is set up is shown in Figure 1.
“The Granta libraries know the electromagnetic properties with high fidelity,” McDonald said. “This all happens behind the scenes for the user.”

Figure 1. Assigning material properties in EMA3D® Cable using Ansys Granta
Once the material properties have been set and the geometry is ready to go, EMA3D® automatically:
- Creates the domain space of the simulation
- Sets boundaries where the simulation will occur
- Meshes the geometry of the enclosure, prepares it for simulation
- Sets up a plane wave source external to the enclosure
- Generates a box probe inside the enclosure
- Initiates running the simulation
“The user has only pressed one button, but all the usual simulation processes will proceed in an automated fashion and once that simulation is complete, all users have to do is right click on the results and process the field statistics,” McDonald said.
When the simulation is finished, the software will then plot the frequency dependent shielding effectiveness, a quantity designers need to know as they begin the design process for broadband shielding effectiveness. The entire process can be seen in Figure 2.
Figure 2. One-click process of simulating shielding effectiveness
Measuring Seams and Gaps, Cables, PCBs
Once the shielding effectiveness of a product has been determined, additional details can be added to that product to start to look at quantities like radiated emissions.
“The radiated emissions are a function of emissions that come from PCBs and packages from the active electronics in the enclosure,” McDonald said. “Those fields may come from cables that are radiating inside of the enclosure and certainly the fields will be affected by the enclosure itself.”
One additional factor that can be added to the simulation is the seams and gaps, this is shown in Figure 3. They can be extremely small, on some occasions even smaller than a micron, which can be hard to include mechanically.
“There’s always a machining tolerance, so there’s never a perfect seal between two edges of a metal box,” McDonald said.
To add these details, users click on a surface and click align between two surfaces to specify where there are tiny gaps. Users can define the gap width. Alternately, users can specify the siemen peens, a quantity that can measure or simulate a sub model.
“It’s very powerful because it allows us to use a much larger computational grid size for our simulation that capture some of these tiny tiny features using a special algorithm,” McDonald said.

Figure 3. Defining seams and gaps in a simulation model
In addition to the seams and gaps, users will need to define cables in order to find radiated emissions. A cable in EMA3D® is based on its path in 3D and 2D cross section. The two-dimensional cross section is based on a cable database. EMA3D® does an inductance and capacitance matrix static solve and then solves down the line with transmission line theory which is co-simulated in the software. Cable definition can be seen in Figure 4.
“Really the way we treat cables is a unique and very special capability in EMA3D®,” McDonald said. “With this tool, it’s the easiest on the market to define all the cables in the enclosure, going outside the enclosure and connected to the enclosure.”
Figure 4. Defining cables in EMA3D® Cable
Sources of emissions may also come from PCBs or packages, which can be directly modeled in EMA3D® Cable. Users are also able to use other electromagnetic tools, like Ansys HFSS or Ansys SIwave, that capture the fields and use Huygen’s Currents Theory to place those emitting objects directly into an EMA3D® model. This method is shown in Figure 5.
For example, if a designer is using Ansys SIwave to design a PCB, it is a very small step to capture the radiated emissions from that board. However, a user will want to see what the emissions are not just from the bare board, but also from the cables and enclosure around the board. EMA3D® gives users a seamless way to pull in those SIwave and HFSS boards.
Figure 5. HFSS Field Import into EMA3D®
Radiated Emissions
The final result is our radiated emission. The results can be seen in Figure 6, which shows that both the boards and cables inside the enclosure are creating fields. The fields are 20 DB higher inside the enclosure, but lower outside because of the shielding.
Figure 6. Internal fields of the simulation model
New in 2023 R1, when completing an EMC test there is a new external field probe in EMA3D® that allows users to capture fields at a specified distance away and angle.
EMA3D® captures the ENH fields on a box around the object and uses Green’s Theory to extract the fields. The final result is the fields versus frequency. Results can be calculated in in several ways including raw fields, volts per meter, or DB microvolts per meter. The last of which is a typical EMC quantity that can be used to compare to an EMC limit curve. Figure 7 shows how this works along with the results plot 10 meters from the unit under test.
Figure 7. External field probe and results
“What this means is users, when they’re designing a product, they can open up the geometry in the products and with just one button, one click, EMA3D® will start the process for the analysis; set up everything needed for the model, make some assumptions, and give the users the results,” McDonald said.
Featured Update 2: EMA3D® API
2023 R1 adds a new API, named pyEMA3D®, that lets users use Python scripts or external tools to control all aspects or many aspects of EMA3D® Cable without interacting with the graphical user interface (GUI). With the script, users can remesh the simulation, run the simulation, and extract the results noninteractively. For example, users are able to use scripts to adjust the geometry of the model and change the position of the cables in the cross section.
“This allows for great automization, for parameterization, or for machine learning statistics tools,” McDonald said.
Users may use Python scripts or connect to other tools like Ansys ModelCenter or Ansys optiSLang.
The focus here will be on the connection with optiSLang. optiSLang controls the parameters of a physics software and adjusts the parameters to decide what new parameters to use based on analyzing the results. The software can even construct a machine learning or sophisticated statistical representation of the results that it is getting from a simulation.
“This would only be possible with the EMA3D API,” McDonald said. “That allows optiSLang to control EMA3D®, run it hundreds of times without user interaction.”
optiSLang also creates a description of the EMA3D® results that users can analyze and see how the parameters are changed without rerunning the simulation. Users also have the machine learning representation of the results to instantly see the changes when parameters are altered.
Figure 8 shows show the process of how a Python script calls the API. To start the user clicks on Insert Cross Section. The user clicks on the cable to add a cross section, the segment is between the dots seen on the cable. Hovering over the cross section allows the user to see how the wires are aligned. Next, users click on Script Editor to open the script. This opens up the script that calls the API. The process starts by clicking the green arrow.
Figure 8. Python script calling the API
Once the API has been called, the model is updated, this process can be seen in Figure 9.
Figure 9. API updates the model
Featured Update 3: Tools to Easily Work with Multiple Cable Harnesses
2023 R1 adds several new capabilities to work with multiple cable harnesses.
Typically, when products are built, whether it is an aircraft, vehicle, or electronic device, users need to merge two things for cables: the structures of what they’re modeling and the path of the cables, which are tracked in 3D CAD. However, inside of the CAD, commonly the inner detail of a cable is missing, and it is instead an empty tube. The inner details are usually kept in cable and wiring databases. In the new release, EMA3D® can now import the details of the wiring databases and merge that with the 3D geometry.
“We’ve added a new cable database format from VeSys, they have an XML cable representation for the connectivity of cables, and we can now import that seamlessly, just like how we currently can import data in the KBL format from Capital Harness of Zuken E3,” McDonald said.
EMA3D® Cable has also added several small user requests that add up to big changes.
Users can now automatically join harnesses at junctions and bulkheads.
“Essentially, when you have a complex vehicle, one cable harness might not be enough to go from one electronics enclosure to another,” McDonald said. “This makes it easier for users with a single click to join those signal types at those interfaces.”
A new feature has been added to allow users to change all of the terminations of the cable in one window. Now with a single interface users can change details such as the resistance, capacitance, or inductance termination at the end of the cable for up to hundreds of individual conductors.
“You may have hundreds of conductors, shields, or over braids that terminate at an equipment interface, we didn’t want to make users always have to dive through sub menus to change those properties,” McDonald said.
A new search tree has also been added that allows users to search for a harness by name, sort them by how they’re named, and visualize them in 3D or in the simulation tree.
Example Model
This is an example where an antenna is being placed within a larger automobile, it can be seen in Figure 10. In this case, the antenna needs to be able to radiate and be correctly modeled. This example also needs to capture the structures of an overall vehicle.

Figure 10. Example antenna model
First a simulation was performed to compare the results to Ansys HFSS. The results shown in Figure 11 prove good correlation between S11 and HFSS.

Figure 11. S11 v. HFSS 11 results
The harness model was then placed within the overall vehicle, shown in Figure 12, to look at coupling between the antenna and the vehicle cables, the vehicle cables to the antenna, or the combined radiated emission of the cable and the antenna together.

Figure 12. Full vehicle model
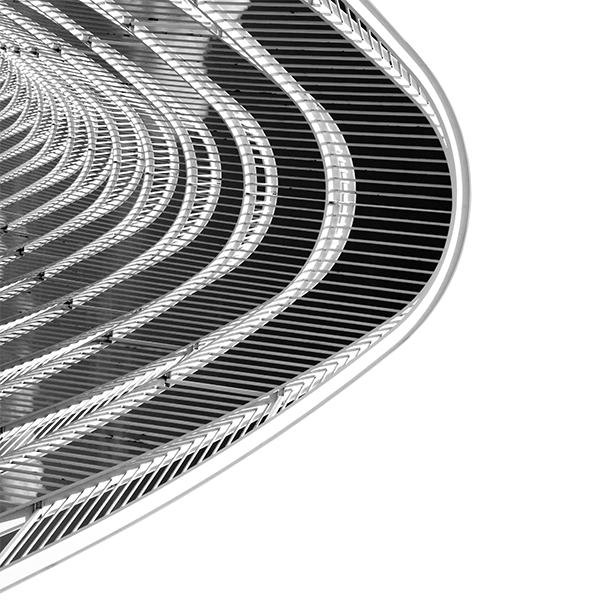
Figure 13 shows the full emissions from the vehicle. It shows that the fields created from both cables and antennas are creating fields in space within and outside of the car.
Figure13. Radiated emissions of a full vehicle
To learn more about these new features from the product manager, sign up for the webinar “Ansys 2023 R1: Ansys EMA3D® Cable and EMA3D® Charge What’s New.”
McDonald says the webinar is for the following users:
- New or prospective users thinking about simulation
- EMC engineers looking to start using simulation
- Mechanical engineers that deal with EMC simulations but are not domain experts
- EMC engineers looking to add complexity to their simulations
The virtual event is Tuesday, March 14, 2023, at 9 a.m. MST. Click here to get signed up.
If you are ready to get started using EMA3D® Cable for your projects, click here.